RDO 預設經已幫我們上載了 Cirros 映像,但如果要上載其他映像怎麼辦,大家記不記得 Glance 管理映像服務?它可以幫我們上載 .img 格式,然後在 Horizon 介面建立此映像 instance。
這篇將會教大家下載 Ubuntu 14.04 映像檔,然後建立 Ubuntu 14.04 instance,再由 SSH 登入使用。
Step 1:大家先在 CentOS 7 輸入以下載 Ubuntu 14.04 映像檔。
wget https://cloud-images.ubuntu.com/releases/14.04.2/release/ubuntu-14.04-server-cloudimg-amd64-disk1.img
Step 2:然後輸入 source keystonerc_admin 才可以使用以下 Glance 指令上載映像。
glance image-create –name “Ubuntu-14.04″ –is-public true –disk-format qcow2 –container-format bare –file ubuntu-14.04-server-cloudimg-amd64-disk1.img
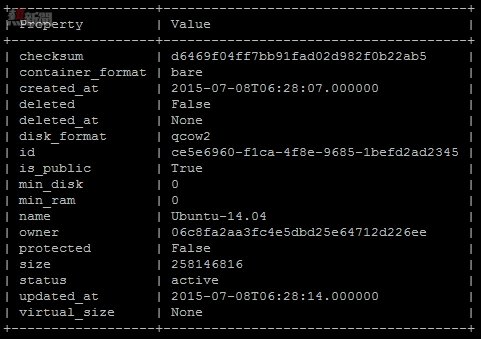
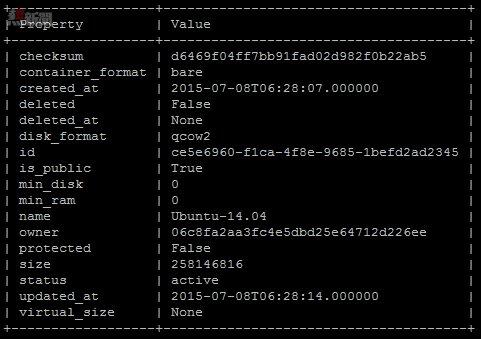
成功上載後會看到以下映像資料。
Step 3:返回 Horizon 介面按左方【Compute】→【Images】就可看到剛上載的Ubuntu-14.04映像。

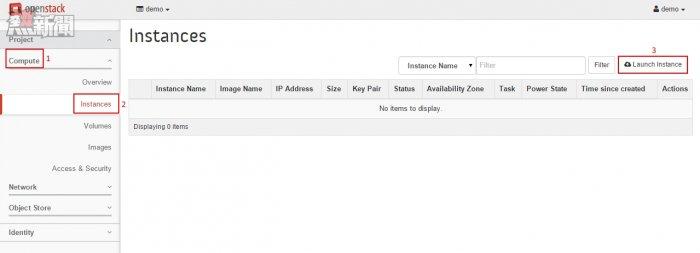
Step 4:現在我們可以建立此 instance,請按左方【Compute】→【Instances】,然後在右方按【Launch Instance】按鈕。
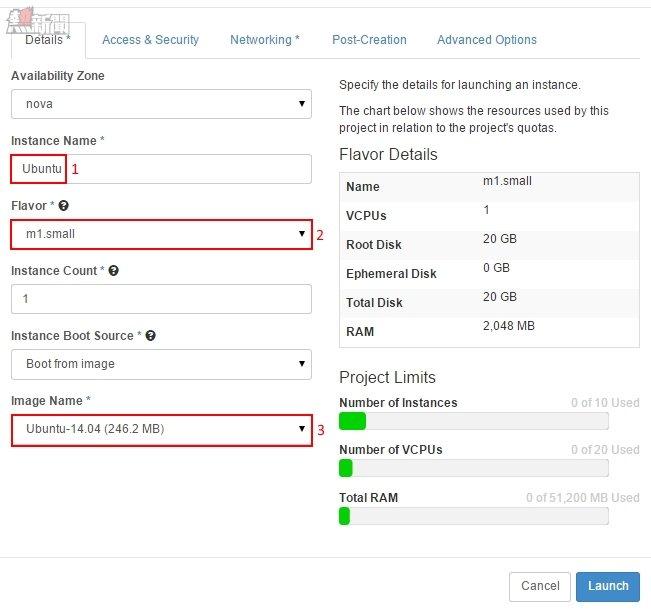
Step 5:因為此 instance 需要超過 1GB 容量,所以請選擇【m1.small】,下方 Image Name 選擇【Ubuntu-14.04】。
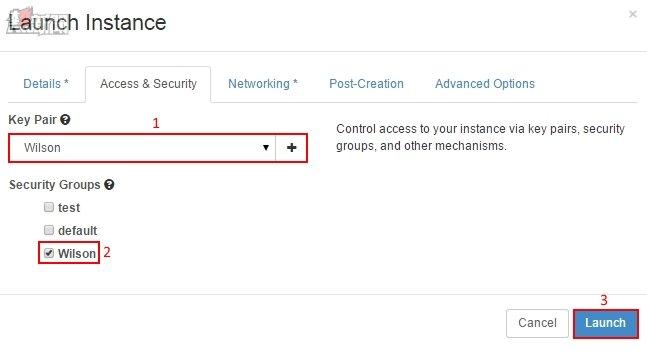
Step 6:再選擇之前的【Wilson】Key Pair及【Wilson】Security Groups,然後按【Launch】按鈕。
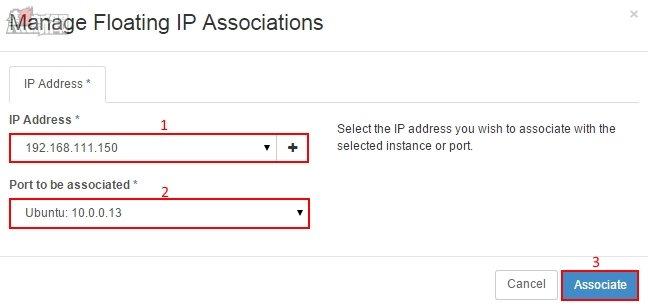
Step 7:大家記著掛載 Floating IP,然後按【Associate】按鈕。
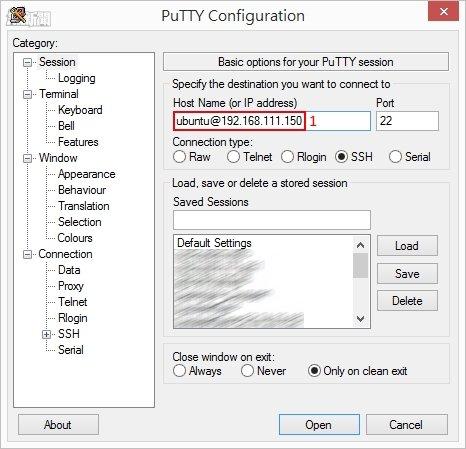
Step 8:開啟 PuTTY 後在輸入
[email protected] /* */。
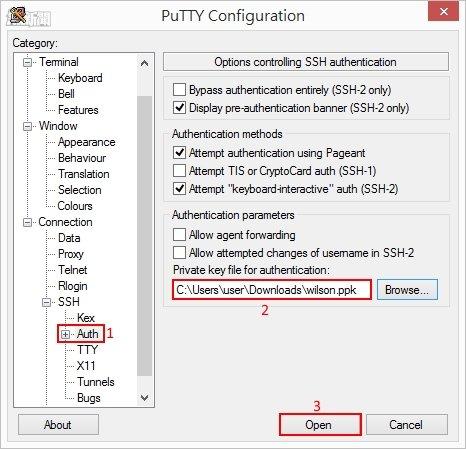
Step 9:然後按左方按【Auth】瀏覽【wilson.ppk】,然後按【Open】按鈕。
Step 10:接著會以 Ubuntu 使用者登入,請等一會。
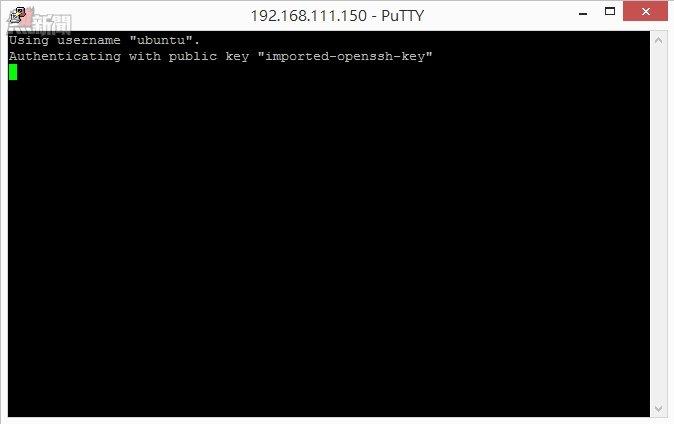
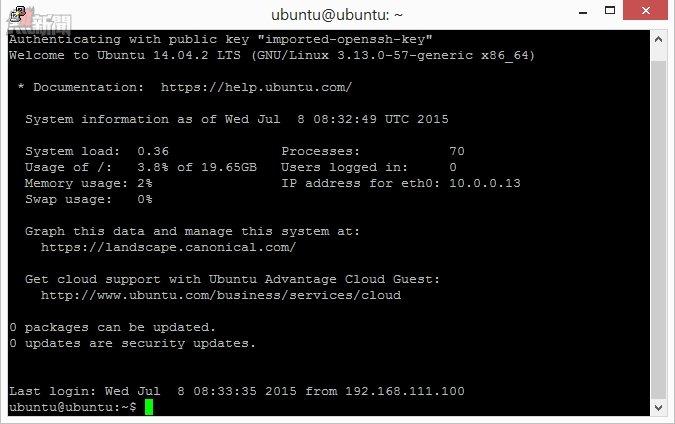
Step 11:成功登入 ubuntu-14.02 系統。
大家看完 OpenStack RDO 教學是否覺得很難呢?只要繼續去研究一定會成功,請大家努力吧!
(第九篇) OpenStack 配置複雜到「跌渣」!RDO 懶人包解決一切煩惱 – 上載 Ubuntu 映像
https://www.facebook.com/hkitblog


