
我們要在兩台 Windows 2008 R2 安裝 Double-Take Server Components,那可經由 Windows 2012 R2 的 Double-Take Client Console 連接來管理,而安裝亦都十分簡單,請大家跟著以下步驟來做。
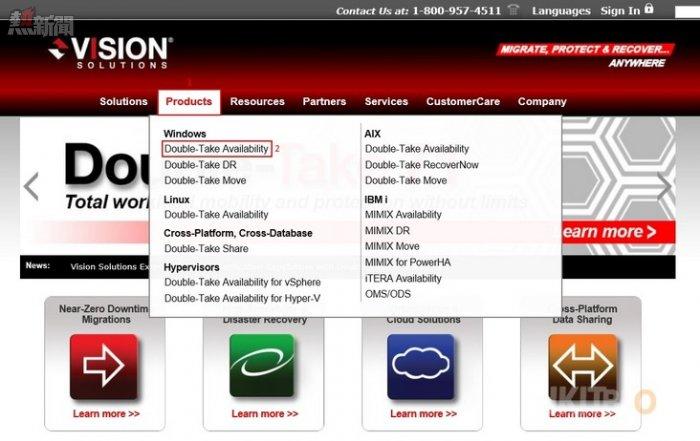
Step 1:大家先到以下官方網站下載 Double-Take Availability 軟件,請按上方【Products】→【Double-Take Availability】。
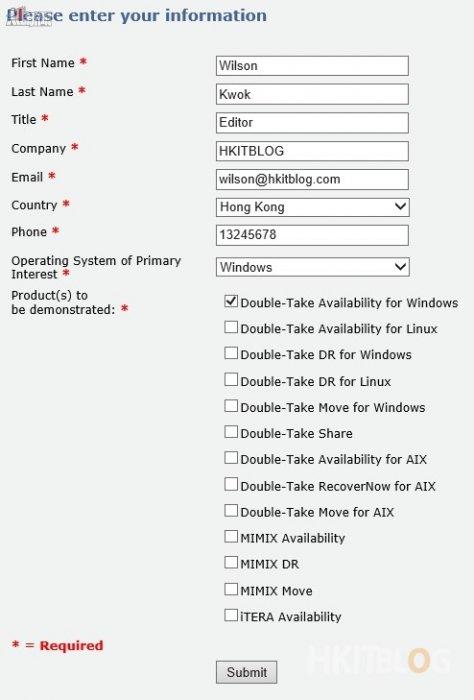
Step 2:接著按右方【Request a Demo】按鈕。

Step 3:輸入申請資料後,VisionSolutions 會有專人聯絡你給你一套試用版本。
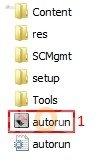
Step 4:解壓縮後按【autorun.exe】檔案。
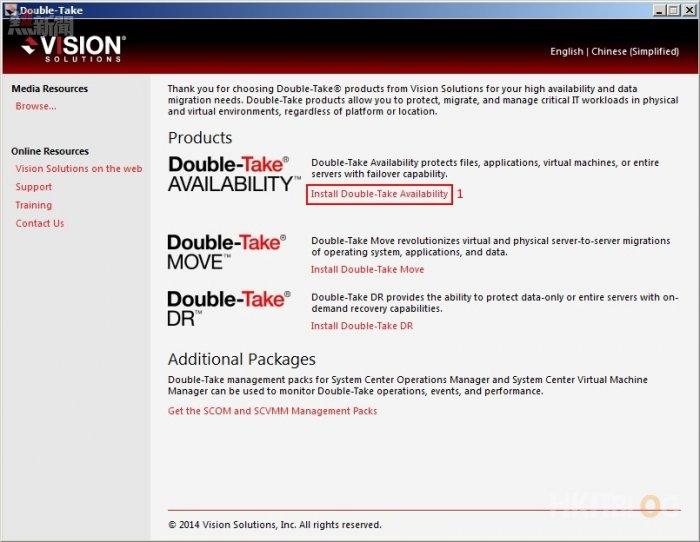
Step 5:接著按【Install Double-Take Availability】按鈕。
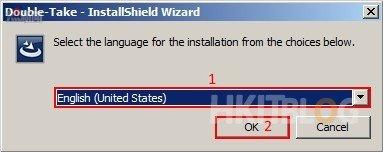
Step 6:選擇安裝語言為【English (United States)】,然後按【OK】按鈕。
Step 7:開始準備 Double-Take Availability。

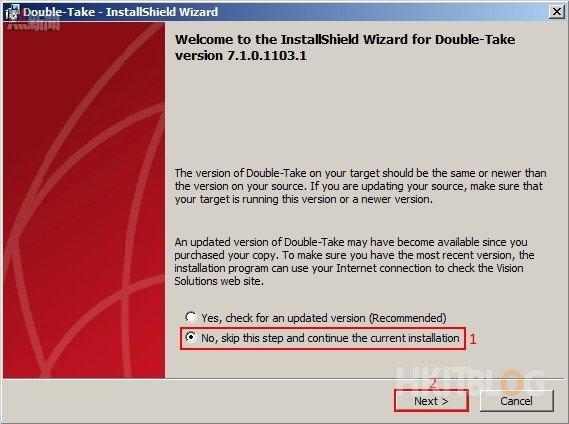
Step 8:系統會問我們是否需要更新,請選擇【No, skip this setup and continue the current installation】,然後按【Next】按鈕。
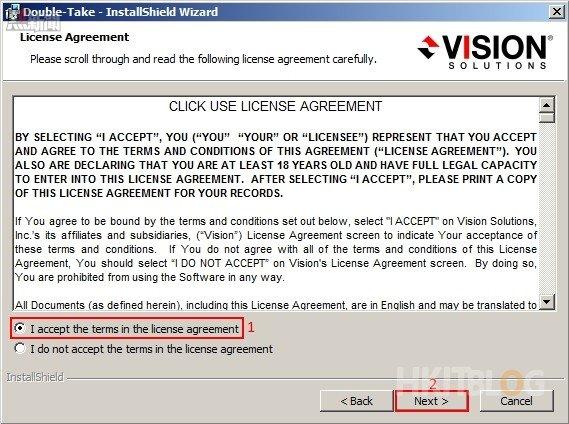
Step 9:接著在授權協議按選擇【I accept the terms in the license agreement】,然後按【Next】按鈕。
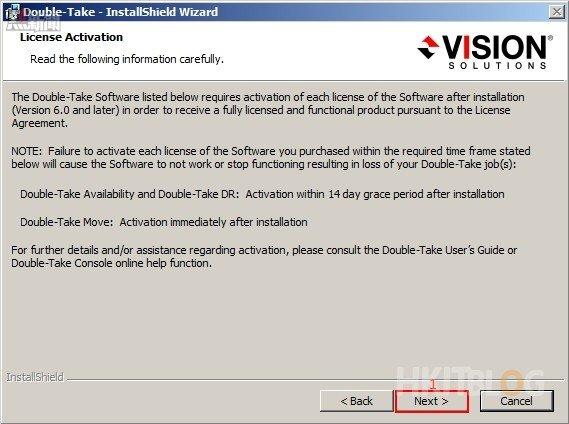
Step 10:這是 license 啟動,不需要理會,請直接按【Next】按鈕。
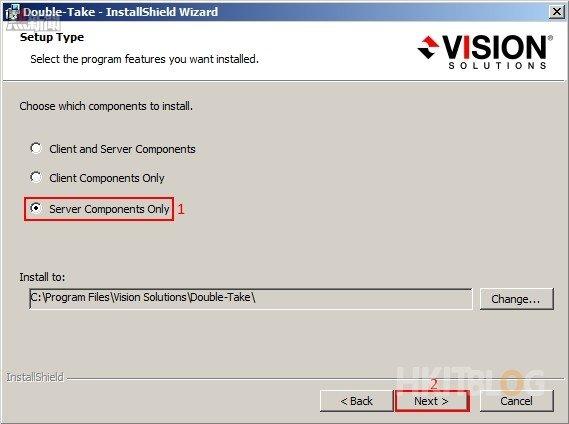
Step 11:因為我們是安裝 Server 元件,請選擇【Server Components Only】,然後按【Next】按鈕。
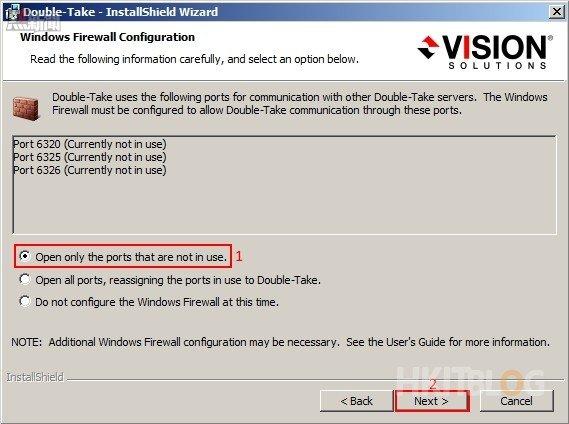
Step 12:系統詢問我們是否開啟 Windows 適當端口,請選擇【Open only the ports that are not in use】,然後按【Next】按鈕。
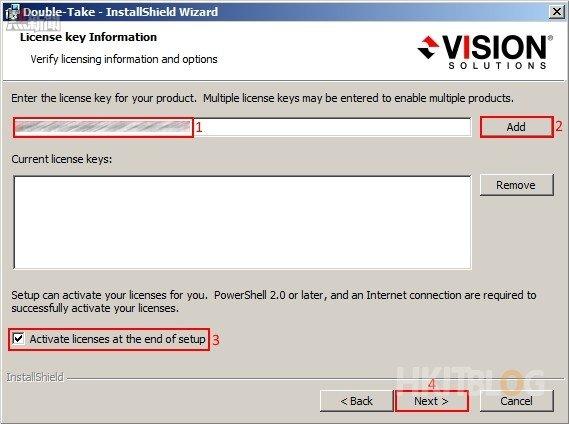
Step 13:接著在上方輸入 Trial Key,跟著按【Add】按鈕,預設經已選擇好下方【Activate license at the end of setup】,然後按【Next】按鈕。
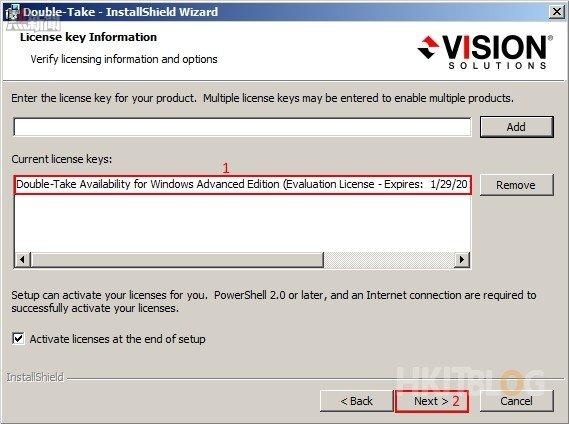
Step 14:成功加入 Trial Key,請直接按【Next】按鈕。
Step 15:不需要更改任何配置,請直接按【Next】按鈕。

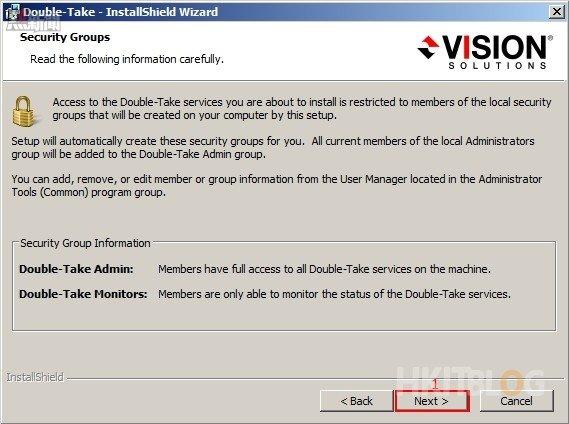
Step 16:系統會幫我們在 Windows 新增兩個 Admin 和 Monitors 群組,然後按【Next】按鈕。
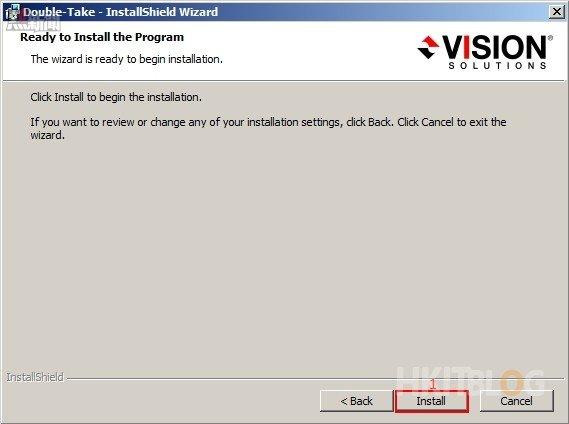
Step 17:請按【Install】按鈕開始安裝。
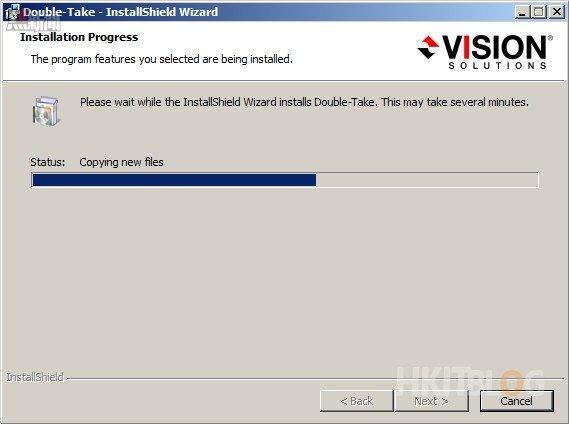
Step 18:請稍等一會。
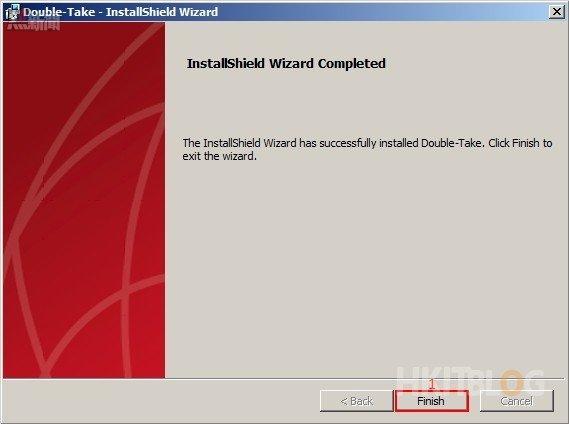
Step 19:安裝完成,請直接按【Finish】按鈕。
下一篇會教大家安裝 Double-Take Client Components,請繼續收看。
(第三章) Double-Take Availability 災難性復原求 – Server 安裝篇
https://www.facebook.com/hkitblog